Uncategorized
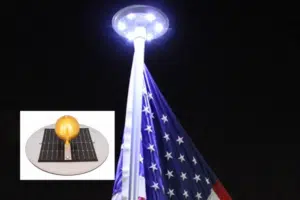
The Benefits of Solar Flagpole Lights
Welcome to the Flagpole Farm blog, where we shed light on all things flag pole related! In today’s post, we’re diving into the radiant world
Are you looking for a new flagpole to increase curb appeal and display your American pride? Are you tired of using lesser-quality poles that look like toothpicks? If so, a 20-foot flagpole from a brand that specializes in American-made and wind-rated flagpoles is what you’re looking for.
Once you’re ready to purchase it becomes a matter of buying and learning how to install an inground flagpole the right way. Make sure you invest in a flagpole with high-quality materials and a modern aesthetic.
See below for an in-depth guide on how to install a 20-foot flagpole or any height of our flagpoles. Proper installation will ensure that your flagpole stands the test of time!
Contrary to popular belief, the success of your flagpole installation doesn’t start when you first break ground on your property. It starts way before that when you initially purchase the flagpole and all of the materials that you need for the job.
We highly suggest that you invest in the Titan Telescoping Flagpole kit. This kit includes everything you need for an aesthetically pleasing flagpole set up in one purchase. In it, you’ll find:
The only things you’ll need to purchase beyond the flagpole kit are pea gravel and concrete mix. You’ll also need a shovel, but if you don’t have one already you can borrow one from a friend, family member, or neighbor.
The Titan Telescoping Flagpole is one of the best in the industry for several reasons. First, it has an incredibly flexible aluminum body. The telescoping technology makes it easy to be taken down and out from the ground sleeve at any time and safely stored away.
Also, a bonus is that it includes swivel ring clips that allow your flag to fly at 360 degrees. That way, it won’t get tangled up as it would on a traditional pole.
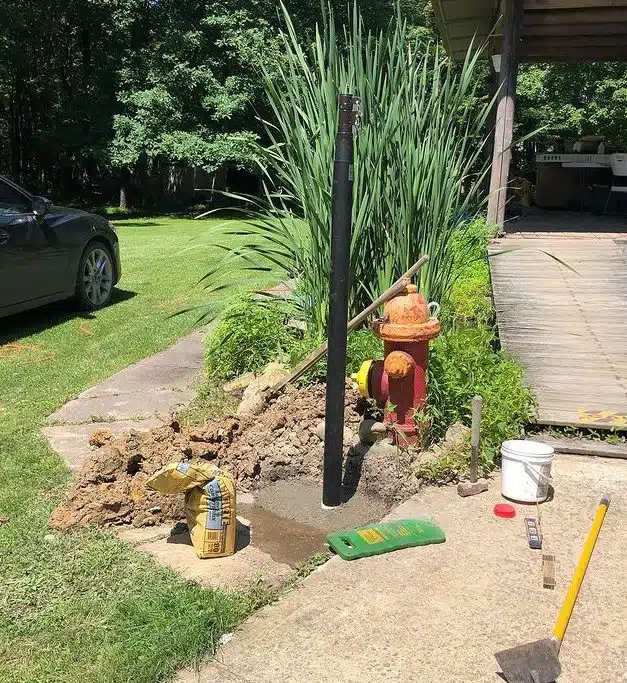
Once you have purchased the Titan Telescoping Flagpole Kit and it is ready to be installed, you should begin the process by digging a hole.
The instructions on your 20-foot flagpole will give you specifications on how wide and deep the hole should be.
Nailing these measurements is essential. If you dig the hole too deep, then the ground sleeve might not be able to protrude from the surface. If you dig too shallow, then the concrete mix won’t be substantial enough to hold your 20-foot flagpole in place.
Once you’ve got the exact measurements of the hole, shovel around 6-inches of pea gravel on the bottom of the hole.
Pea gravel is essential because it helps water drain from the ground sleeve and your hole into the earth below. It also provides your materials with a little more stability underneath the concrete slab that you’ll pour.
Be sure to take a tape measure and ensure that the pea gravel is anywhere between 4 to 6-inches. Again, any more or less than that could thwart the integrity of your 20-foot flagpole.
Now that the pea gravel is in place, it’s time to start mixing the concrete that you’ve purchased. We don’t have any recommendations on specific brands, but be sure to ask a representative at the home improvement store for their professional opinion.
Before you start mixing the concrete, be sure to tighten the stop bolt through the ground sleeve in your Titan Telescoping Kit. There’s a pre-drilled hole for it, so hand tightening the bolt should do the trick!
Once that stop bolt is in place, take the ground sleeve and set it into the pea gravel that you placed in the hole.
Again, it’s vitally important that the top of the ground sleeve remain at least 1 inch above the surface level. If it doesn’t, then the entire thing could flood or become damaged. Make sure the ground sleeve fits comfortably inside the pea gravel.
If you purchased the Titan Telescoping Flagpole kit, then there will be a red cap that came in the package. Grab that red cap and set it on top of the ground sleeve before you pour the concrete.
Once it’s on, take your shovel and start pouring your concrete in the hole and around the ground sleeve. Continue pouring until the concrete is up to surface level.
Keep an eye on the ground sleeve as you pour the concrete. Make sure its top stays an inch above the surface level. Also, use a level to make sure the ground sleeve isn’t slanted in any way.
Once you’ve poured the concrete, all that’s left to do is let it dry for anywhere from 24 to 48 hours.
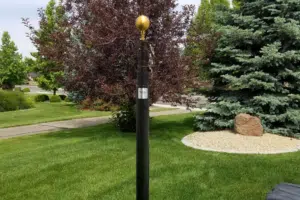
Whenever you feel like it’s dry, remove the red cap from the ground sleeve, then install your Telescoping flagpole inside of it.
The beauty of the telescoping flagpole and ground sleeve system is that the pole can be removed and stored at any time. This will increase the lifespan of your flagpole and help you ensure that the American Flag flies free on your property for many years to come!
Now that you have seen all of the different steps to take when you want to install a 20-foot flagpole, it’s time to start with step one: purchasing a Titan Telescoping Flagpole Kit.
Be sure to read this article for important information on etiquette rules you should know for flying the American Flag in your yard.
For more inquiries that you may have, please be sure to reach out to us by email at info@flagpolefarm.com and we’ll be happy to assist you further.
*Blog Disclaimer: Flagpole Farm and Titan Telescoping Flagpoles are businesses solely focused on the production and sale of flagpoles and similar accessories. This blog is not to be used as a factual reference, rather as an opinion-based forum in which the information within is not official statements made on behalf of or by Flagpole Farm or Titan Telescoping Flagpoles. Information provided on this blog is accurate and true to the best of the writers’ knowledge, however, there may be omissions, errors, or mistakes. The writers of these blogs are not professionals in the Flagpole industry and the information included within this blog should not be viewed as written by such. At any point, Flagpole Farm reserves the right to change the focus and/or content of this blog.
Welcome to the Flagpole Farm blog, where we shed light on all things flag pole related! In today’s post, we’re diving into the radiant world
At Flagpole Farm, we understand that the flag isn’t just a piece of cloth; it’s a symbol of freedom, unity, and the unwavering spirit of